In May 2023 I wrote about building and installing a homebrew random-wire antenna and unun (UNbalanced-to-UNbalanced transformer). At the time, I had used what was readily available to me, but it didn't work particularly well. Yesterday I was finally able to complete the assembly of a newer, more purpose-built unun to see if I could get better performance from it.
As mentioned previously, please have low expectations of my wood-working and other construction abilities. I frequently struggle with motor-skills issues, don't have a proper workshop and use basic hand tools to do this stuff. You have been warned!

On the first unun build in 2023, I used a greenish-blue toroid that, more than likely, came out of an old computer power supply. Also the trifilar windings weren't really accurately counted and I just basically threw that into the first unun because of nostalgia.
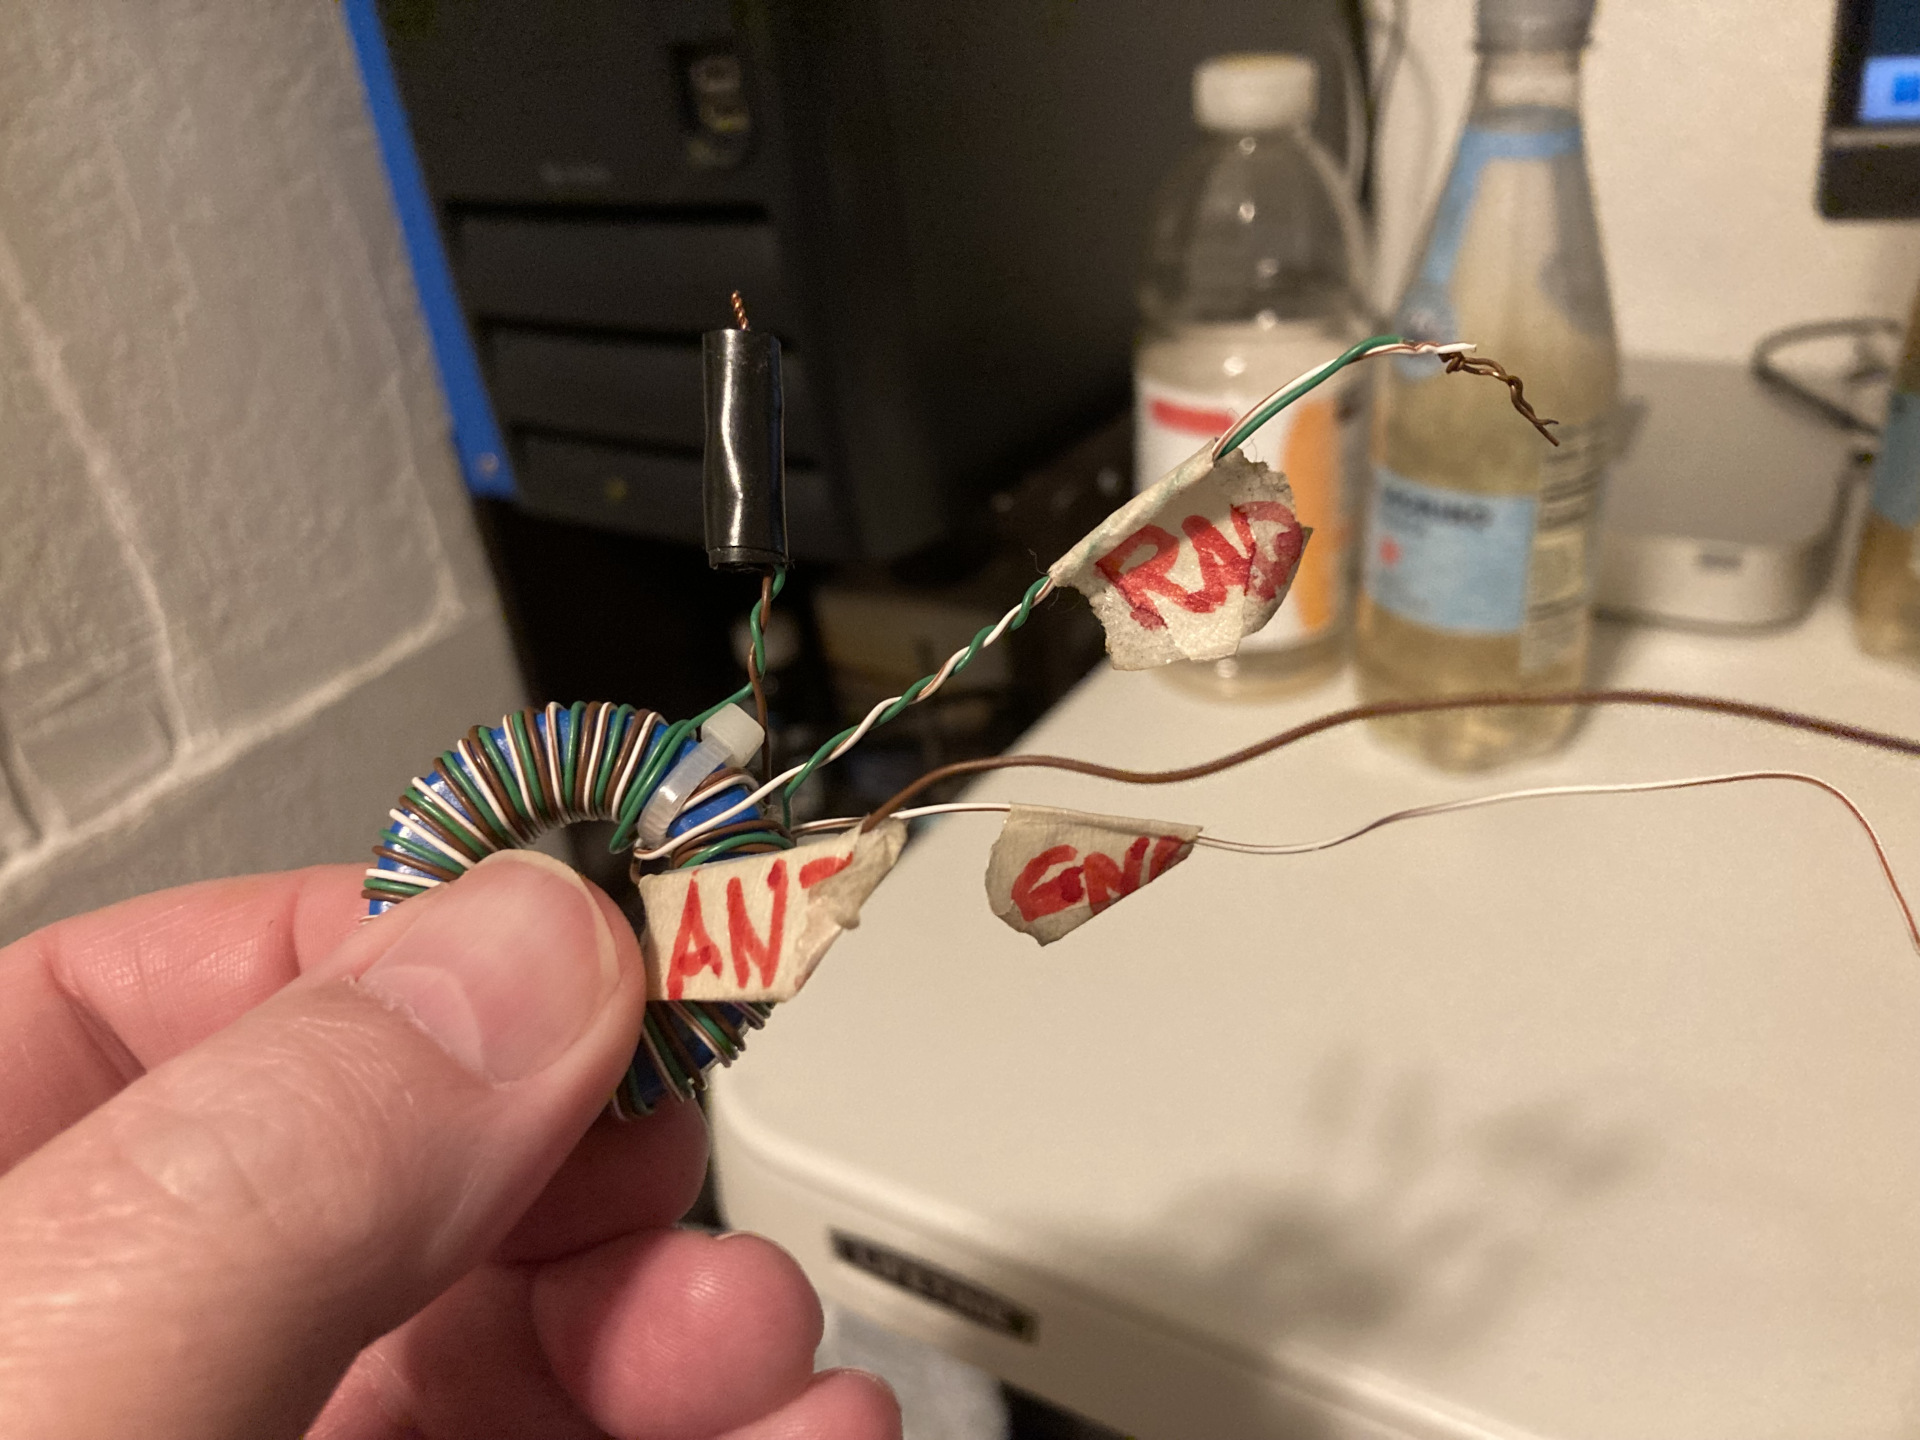
An old friend, my 9-to-1(ish) unun from years ago (click to enlarge)
Nostalgia doesn't always perform well
This old toroid and windings enabled me to do my first HF (shortwave) amateur radio
transmissions on a long-wire antenna laying on the roof of our very first house over
ten years ago. I only had a couple of Chinese Pixies and later an MFJ Cub for 40 meters
but never made any contacts. I do know that I was getting out a little ways
-- I could hear my signal on a WebSDR receiver in Washington state.
While I had some fond memories with this old bare unun, it just wasn't doing the job. From the time I installed it in 2023 to now, I had only made a partial CW contact and my RBN spots were dismal. I began to suspect that the heart of my unun just wasn't 'in it'.
The (Fair)-Rite Stuff
After purchasing a couple of Fair-Rite type 43 44mm toroids and some door-bell wire, I
was able to wind a proper 9-to-1 unun that could probably handle up to 50
watts, although nothing I have can output nearly that much power. I also ordered a
plastic enclosure but didn't realize how tiny the thing really was, and my budget did
not allow for another enclosure purchase. Guess it was time to build another wooden
contraption!
Unfortunately I did not take pictures of me building this newer unun enclosure as I was being lazy this time around and figured it might bore folks out of their minds. I did manage to cut the frame pieces a little better thanks to a nice hand saw my dad blessed me with. Also I made the enclosure a bit bigger to allow easier access to everything.
Here's what I had after building the frame, gluing and nailing the back cover and gluing on a round peg that would support the toroid as well as the requisite green paint...
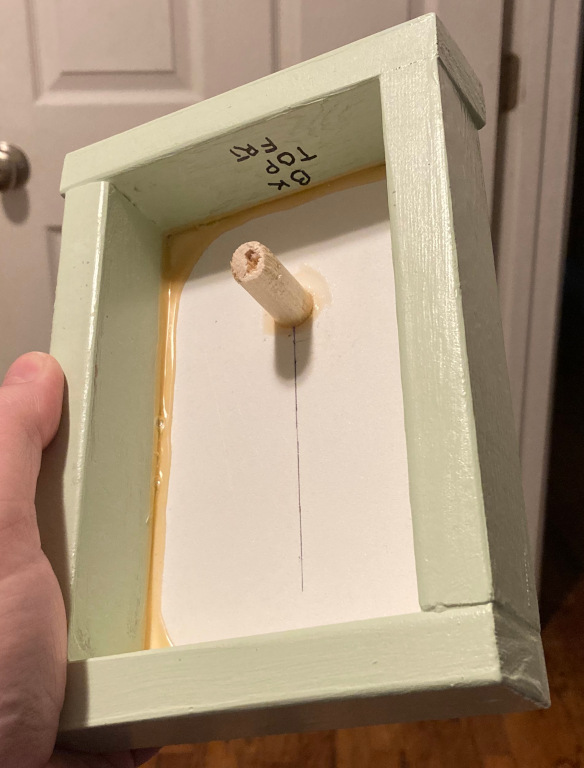
The frame, back cover and peg for the toroid (click to enlarge)
At first I tried hot glue to secure the toroid to the back cover. It stayed put for several months (the project was put on hold for a while). When I got back to work on it the other day, I tapped the enclosure to get some sawdust out of it and the toroid came flying out. Guess hot glue is out! Since the wooden peg still stayed attached, I decided to just cut a couple of square 'dowels' and push them up against the toroid, gently but solidly holding it in place.
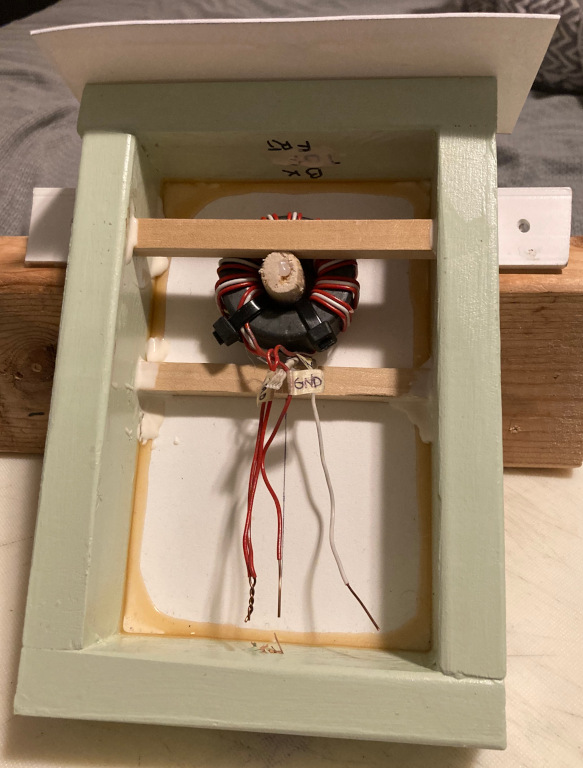
Braces to hold toroid in place (click to enlarge)
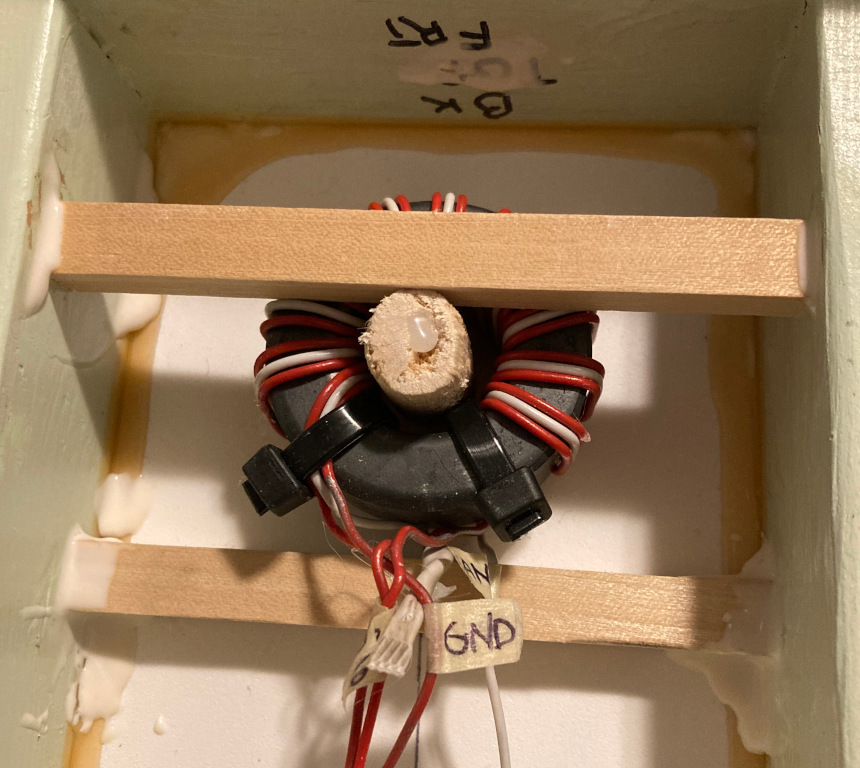
Close-up of toroid braces (click to enlarge)
When I built the previous unun enclosure, I didn't do a very good job securing the coax coming into the box. I ended up jamming a couple of cable-tie ends into the hole and that did the trick. I didn't want to do that this time, so I ended up making a coax cable clamp with two small pieces of square 'dowel' and some screws. This clamp will hold onto the incoming coax and limit its rotation to prevent strain damage.

Premium wood coax clamp (click to enlarge)
You can see below how I put the cable clamp to use. I put a washer and cable-tie to secure things.
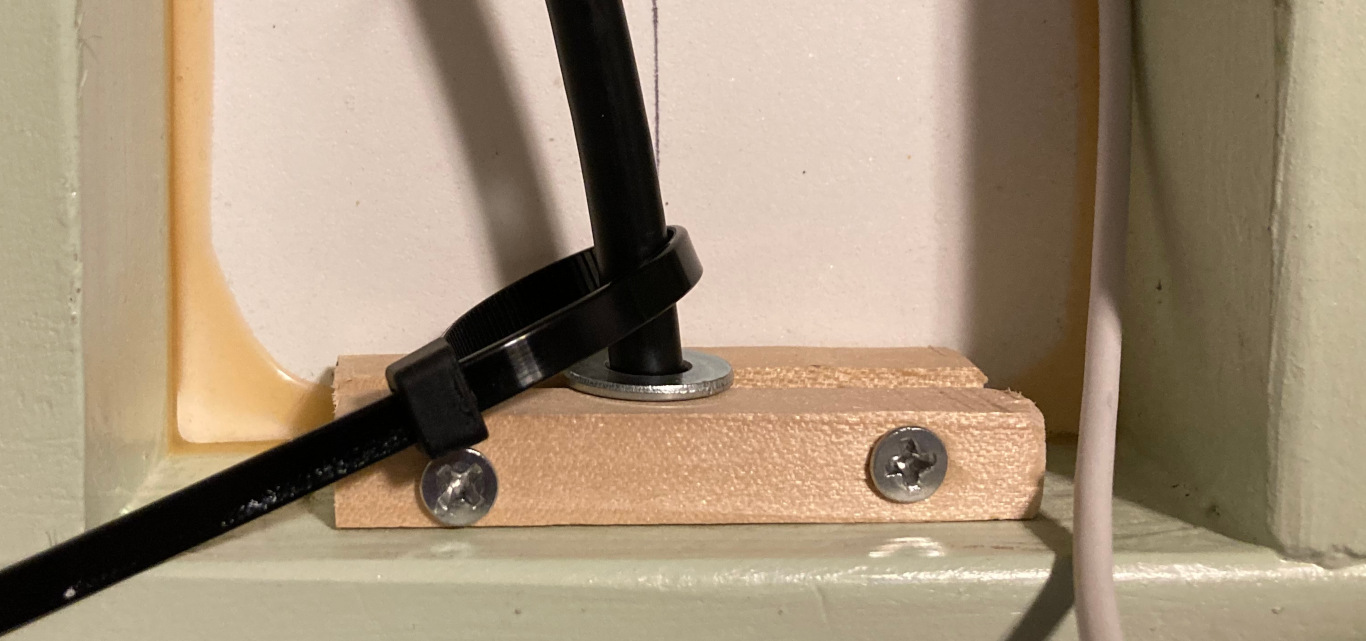
Clamp, washer and wire-tie in place (click to enlarge)
Next, I wired up the unun to the coax and the feeder wires that would run outside of the box for the antenna and counterpoise connections. I decided not to go with studs or screws on the sides for the antenna and counterpoise connections this time because I was being lazy and it proved problematic on the previous build. With everything wired up and covered with shrink-tube, it was time for the front cover. This time around there were no major build snafus.
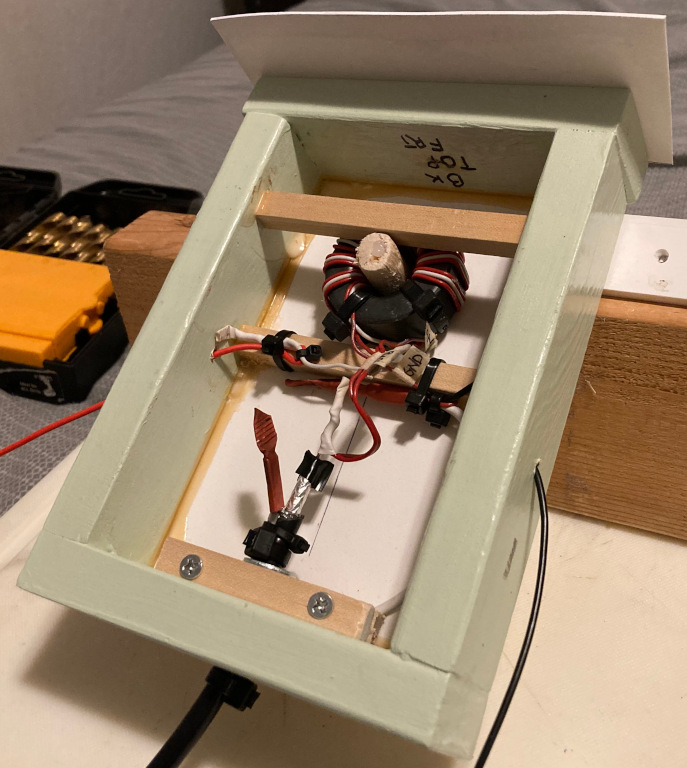
All done, ready for front cover (click to enlarge)
Being the lazy guy that I was the other day, I did not take a picture of the finished unit. It looked kind of ugly because I had to put some foam tape around the front frame of the enclosure due to the flimsy plastic front cover having large gaps. The foam tape helped and it should give bugs a harder time of it.
Testing time
After running back and forth a few times, I finally got this new unun installed outside.
I was eager to test it and see if my labor was in vain or not. I broke out my Venus
SW-3B and did a quick three-band CW test -- 20, 30 and 40 meters. It was around 5:00 pm
so I didn't expect much from 20 meters, but just in the quick seven minute test I
performed, I got zero RBN hits on 20 meters, one hit on 30 and one hit on 40 meters --
not bad! That would have been a small miracle with the last unun so I knew things were
looking up! Turns out that when you use the right components, stuff works better! ![]()
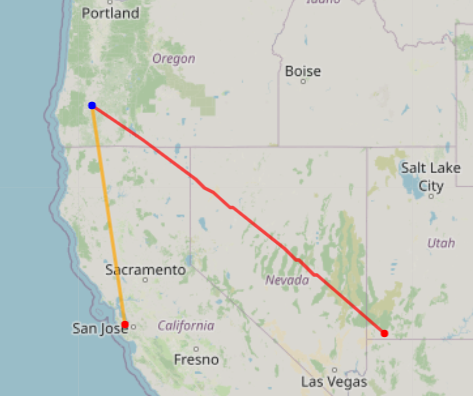
Seems to be working! (click to enlarge)
More testing will definitely come soon. I look forward to trying SSB with the uBitX v6 to see if that works, and will keep trying with CW on the SW-3B. If things look favorable, I may even break out my Chinese Pixie and see if I make it past my room's four walls!
God bless you, and thank you for reading!
![]()
About me
First and foremost I'm a follower of Jesus Christ. After that, I'm a blessed husband,
father and grandfather. I do remote computer work for a living although it's mostly
part-time. I'm an amateur radio operator - AF7EC. When I'm not working on the endless
list of house and car projects, I like to tinker with electronics, like to listen to
shortwave radio and write software (mostly open-source) in C, C++, Python and Free
Pascal. I usually run Linux as my main operating system but sometimes I'm forced to
endure macOS and Windows 11 for gaming with my son or testing software. Overall, I am
a big nobody, but always willing to share about Jesus and all that God has done for me
and my family.
Comments
(No comments yet)