Since I've been feeling better lately, I've been wanting to keep my hands busy and do some fun amateur radio stuff. The original paint pole antenna (see the 'Related' link above) worked well for a while, but then starting messing up. I'm not sure if I disturbed something or a connection changed for some reason, but it just never really worked well after the first month or so.

Note: Right-click and choose 'Open image in new tab' to see larger versions of the images. I apologize for the 'mood lighting'...I'm not set up to do bright photo sessions. Also, I am not highly skilled at homebrewing equipment, but I enjoy doing it anyway. I don't have much in the way of tools or a proper workshop, so please forgive any faux-paseseses.
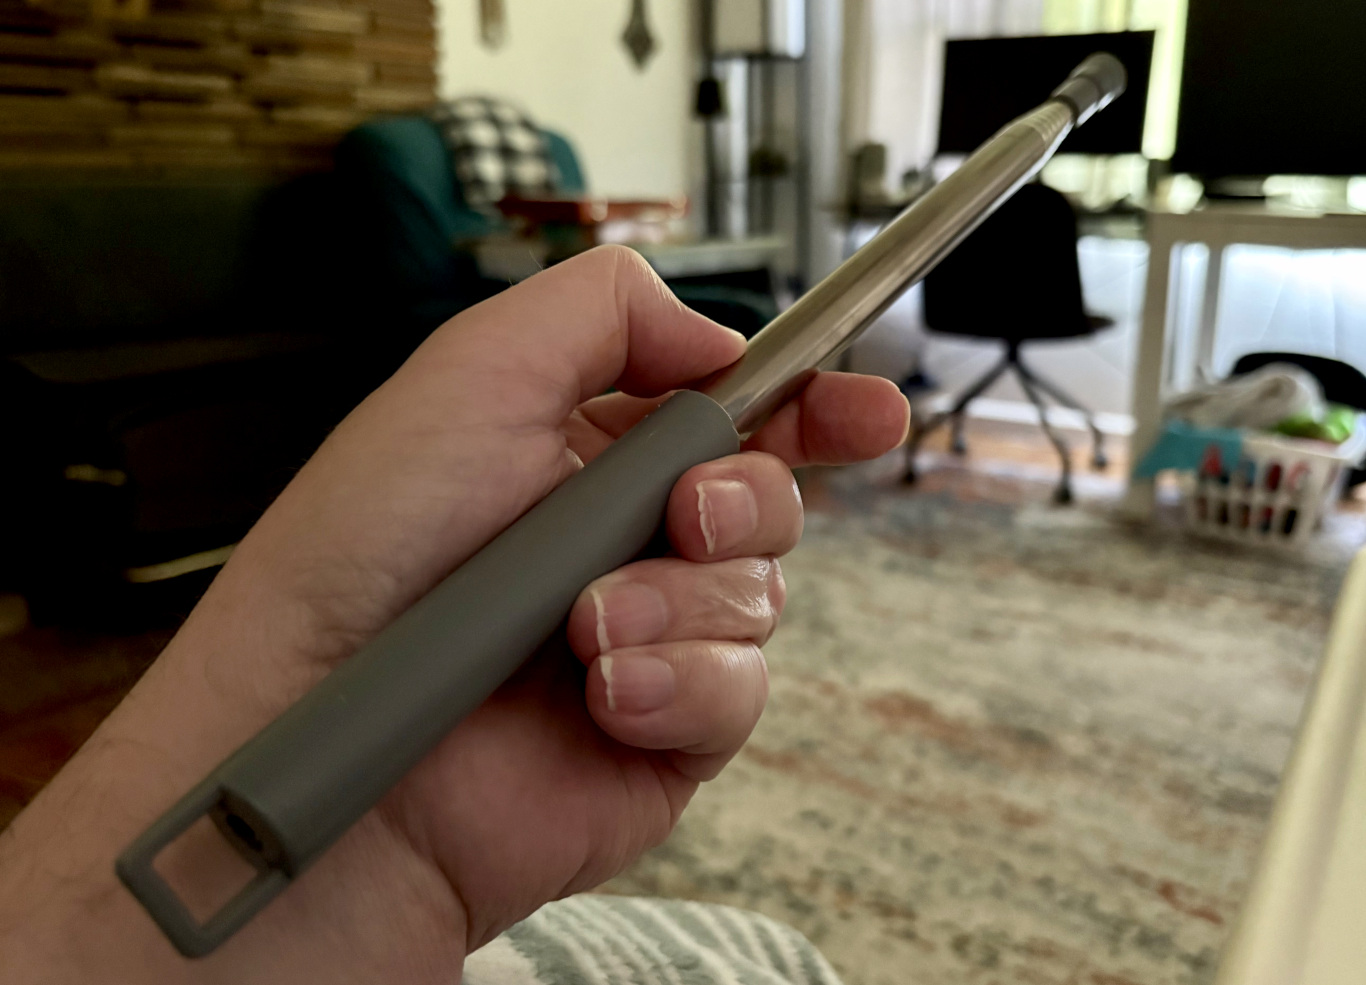
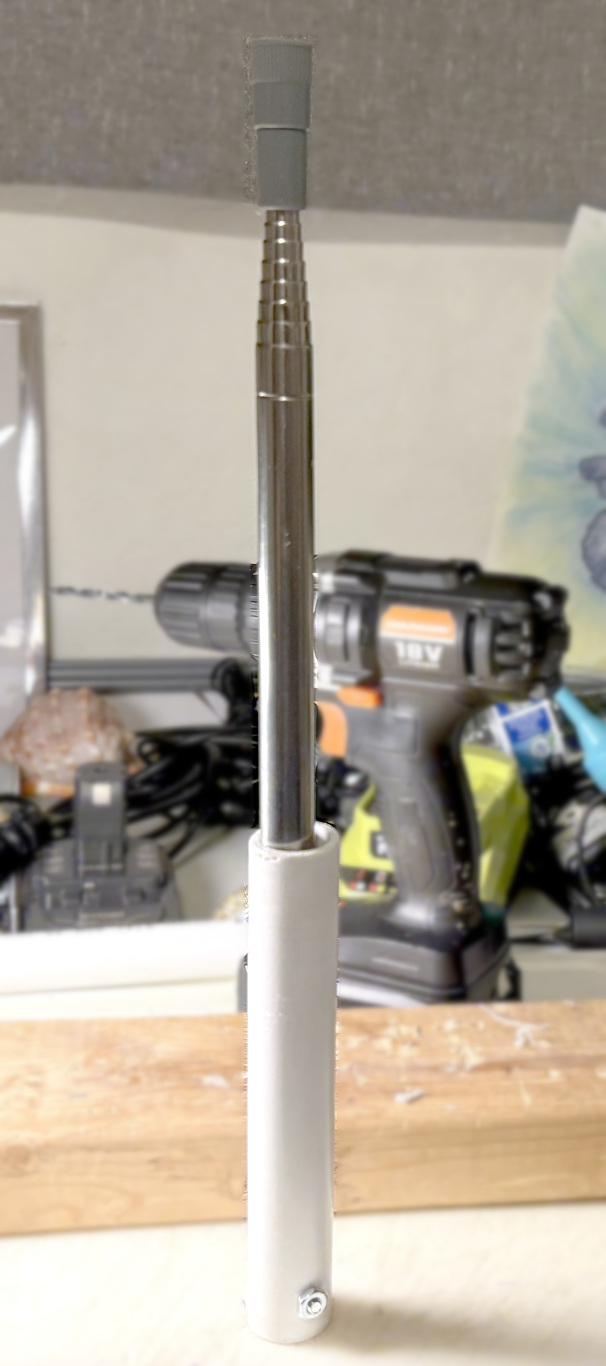
First piece - the telescoping whip
A few years ago, my wife purchased a ceiling fan cleaning kit. Included with the kit was a seven-foot
telescoping handle. She immediately saw that the handle wouldn't be sturdy enough for her purposes so
she gifted it to me. Since then it's been used as a back-scratcher until I was feeling good enough to
turn it into an antenna. I knew almost right away that it would part of a new paint pole antenna
project and had plenty of time to think it out before I got started.
Telescoping ceiling fan cleaner handle
Preparing the plastic bottom base
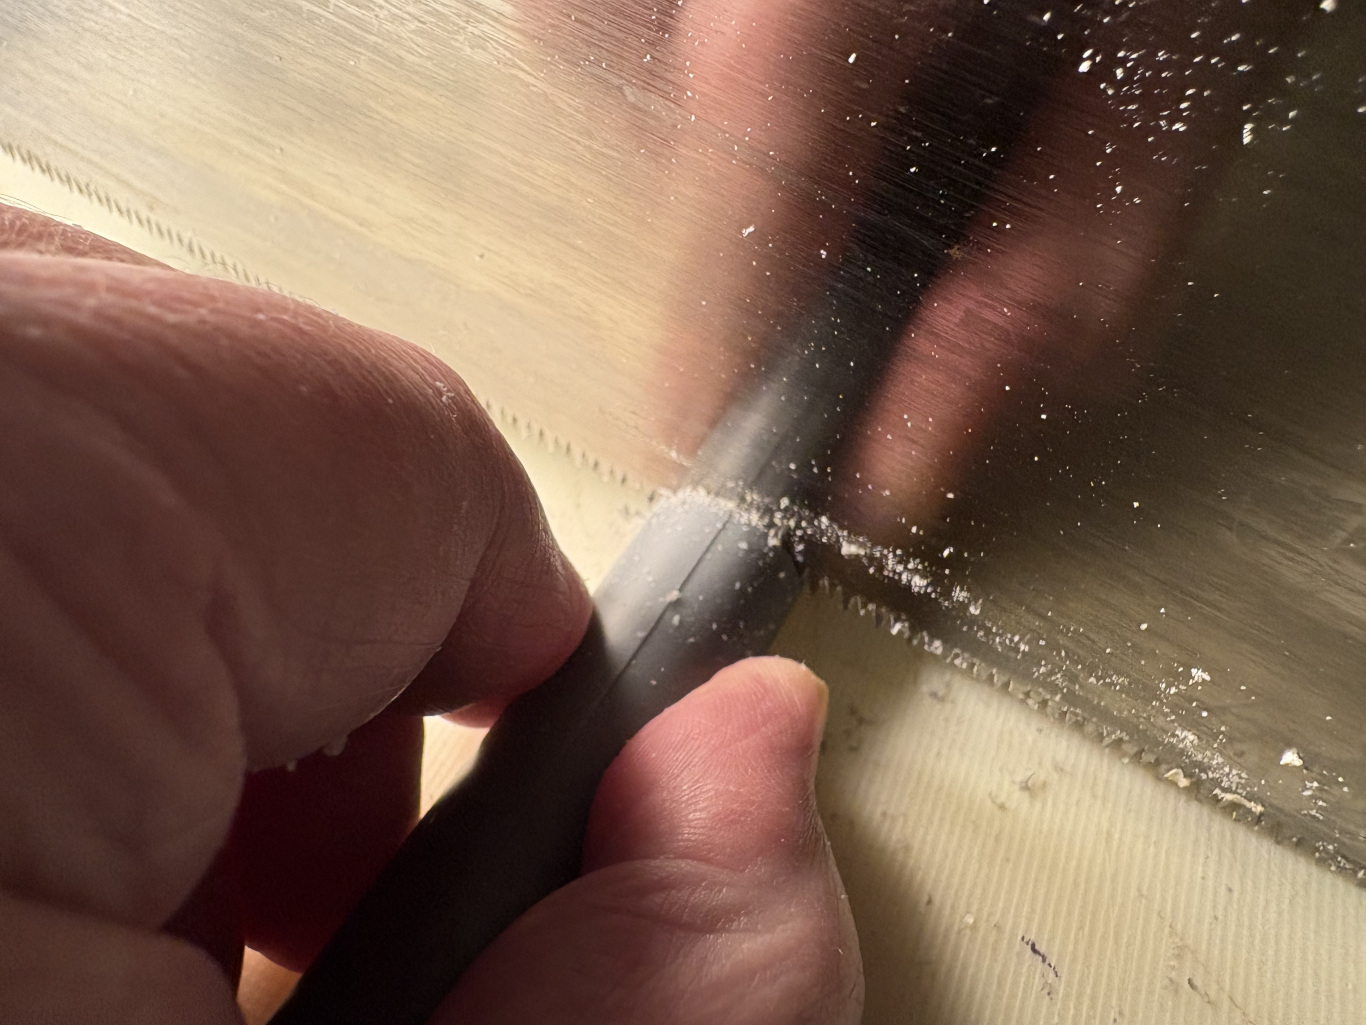
The first order of business was to cut the hook off of the bottom of the handle base. It just seems like
it would get in the way. I sanded down the remaining nubs until the base was mostly flat at the
bottom.
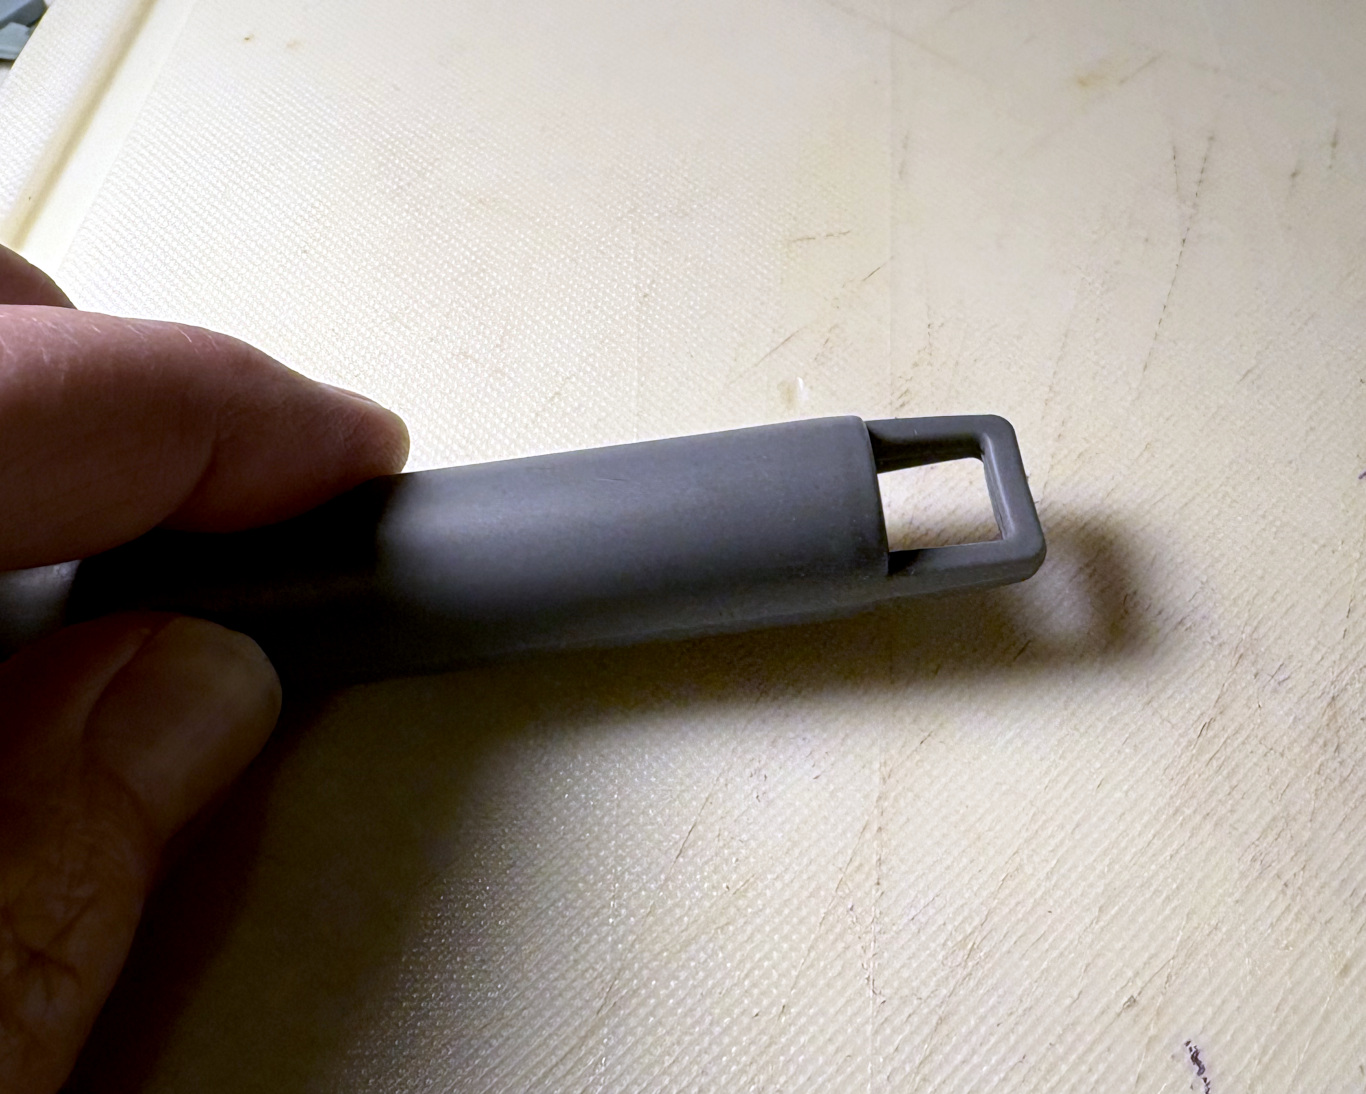
The hook at the base of the handle cover
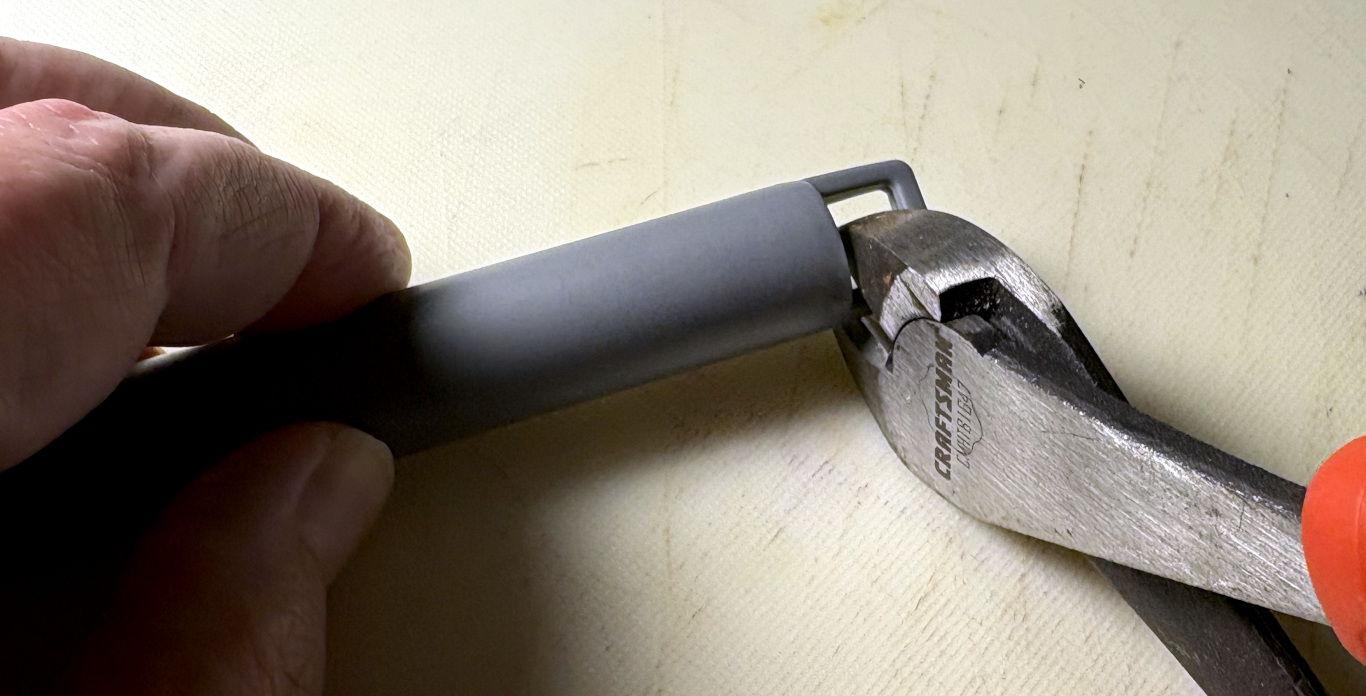
Cutting off the hook
The next thing to do was to shorten the base. The base covered too much of the antenna, so I wanted just enough to keep dust and dirt out of the bottom of the telescoping part without it interfering with other parts of the build.
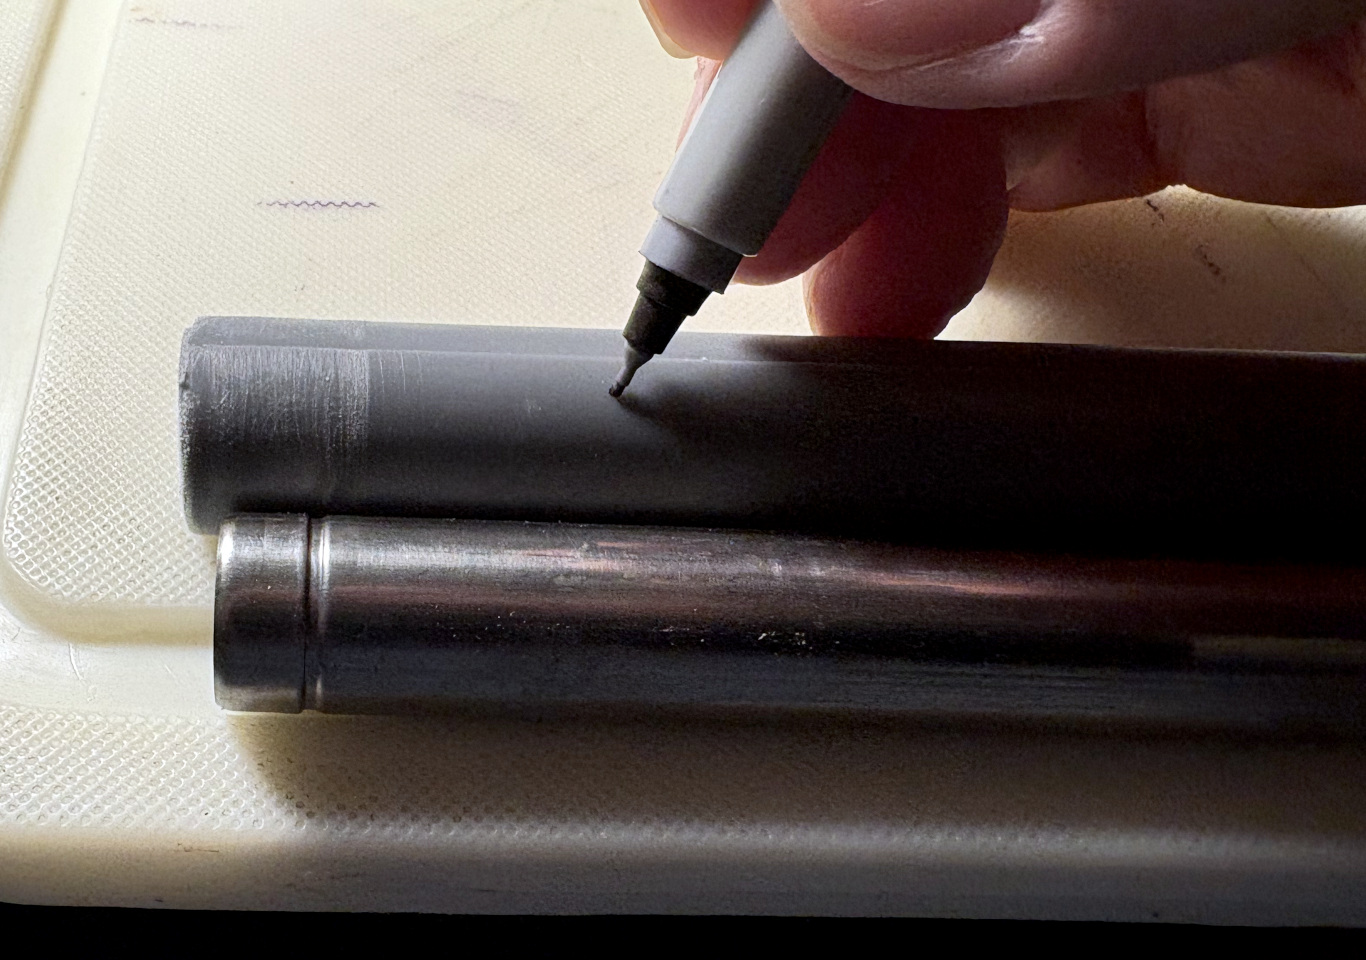
Marking where I want to cut the base
Cutting the base down
Sanding the cut side
(Man, my hand looks old now 😔)
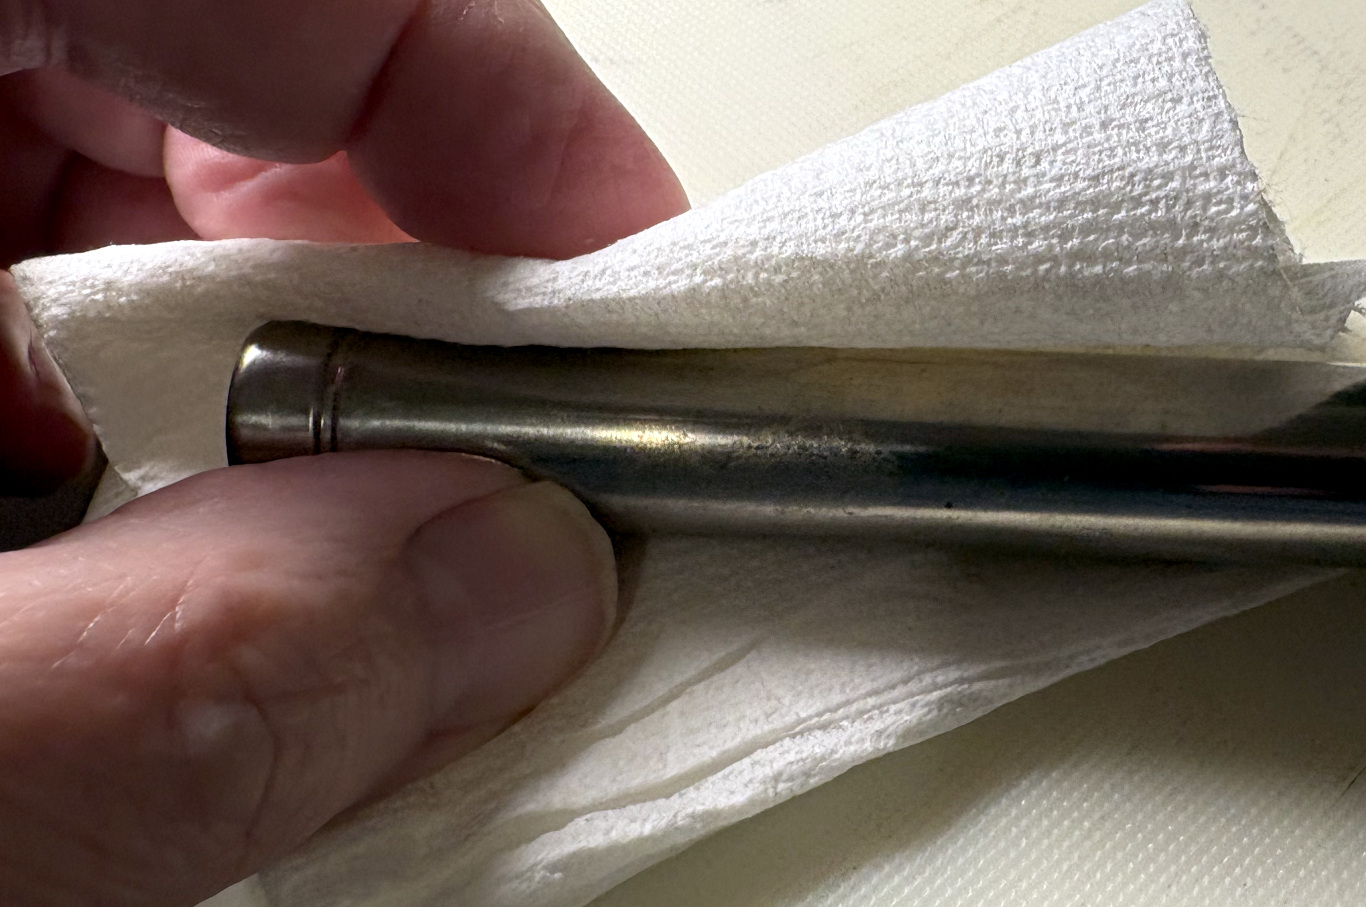
Cleaning the bottom of the antenna before refitting the base
Shortening the PVC pipe holder
I had a small piece of PVC pipe that I wanted to use to hold the telescoping whip. The whip diameter
fits inside it with just a little room to spare. I then marked the PVC pipe for the length I thought
would be best for supporting the antenna but not being so long that it would be unwieldy. After
cutting the pipe, I ran the cut side over 100 grit sandpaper for a while until it was smooth enough.

Marking the PVC pipe holder cut

Sanding the rough edges

The length looks about right
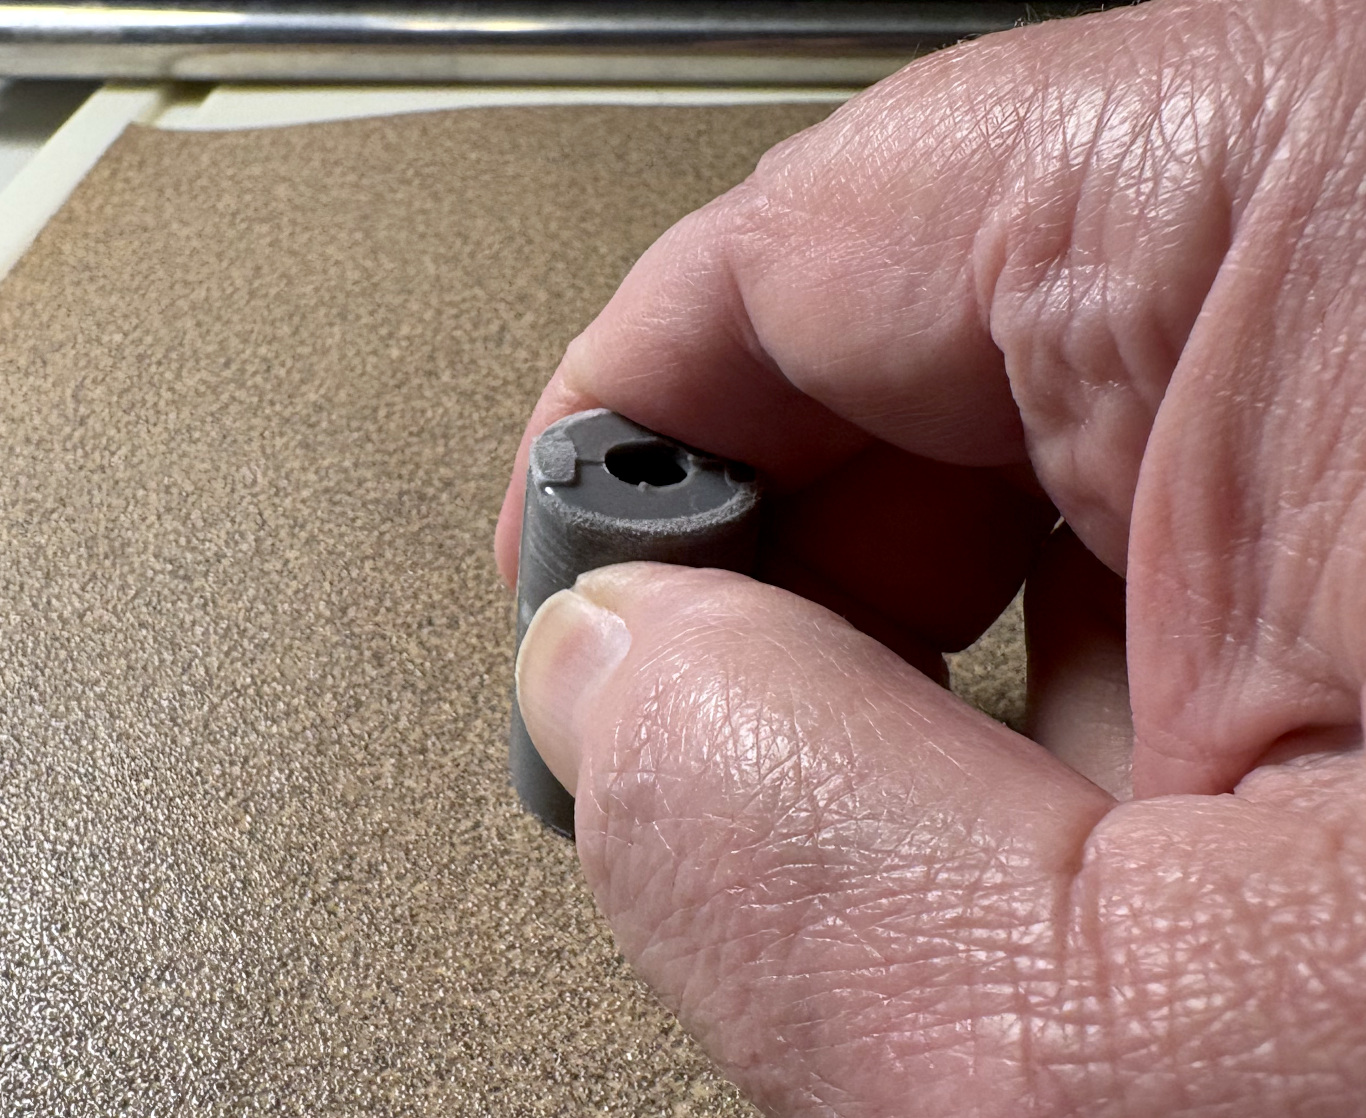
Figuring out a stopper
Next, I needed something to keep the telescoping whip from dropping completely through the PVC pipe
holder. I looked through my junk parts baggie and found an old earplug storage case. When I tried to
cut it down to size, it just cracked and shattered, so that came to a frustrating halt.

Should I use this earplug case for a stopper?

Trying to cut it down to size - CRACK!
After giving it some thought, I decided to just run a screw through the PVC pipe to act as a stopper. I didn't really want to use something metallic in this area, but I don't have any nylon fasteners. It probably won't affect the antenna too much (I hope!). Maybe one day I'll grab a nylon screw and nut to replace the metal one.

Marking where to drill the stopper screw hole
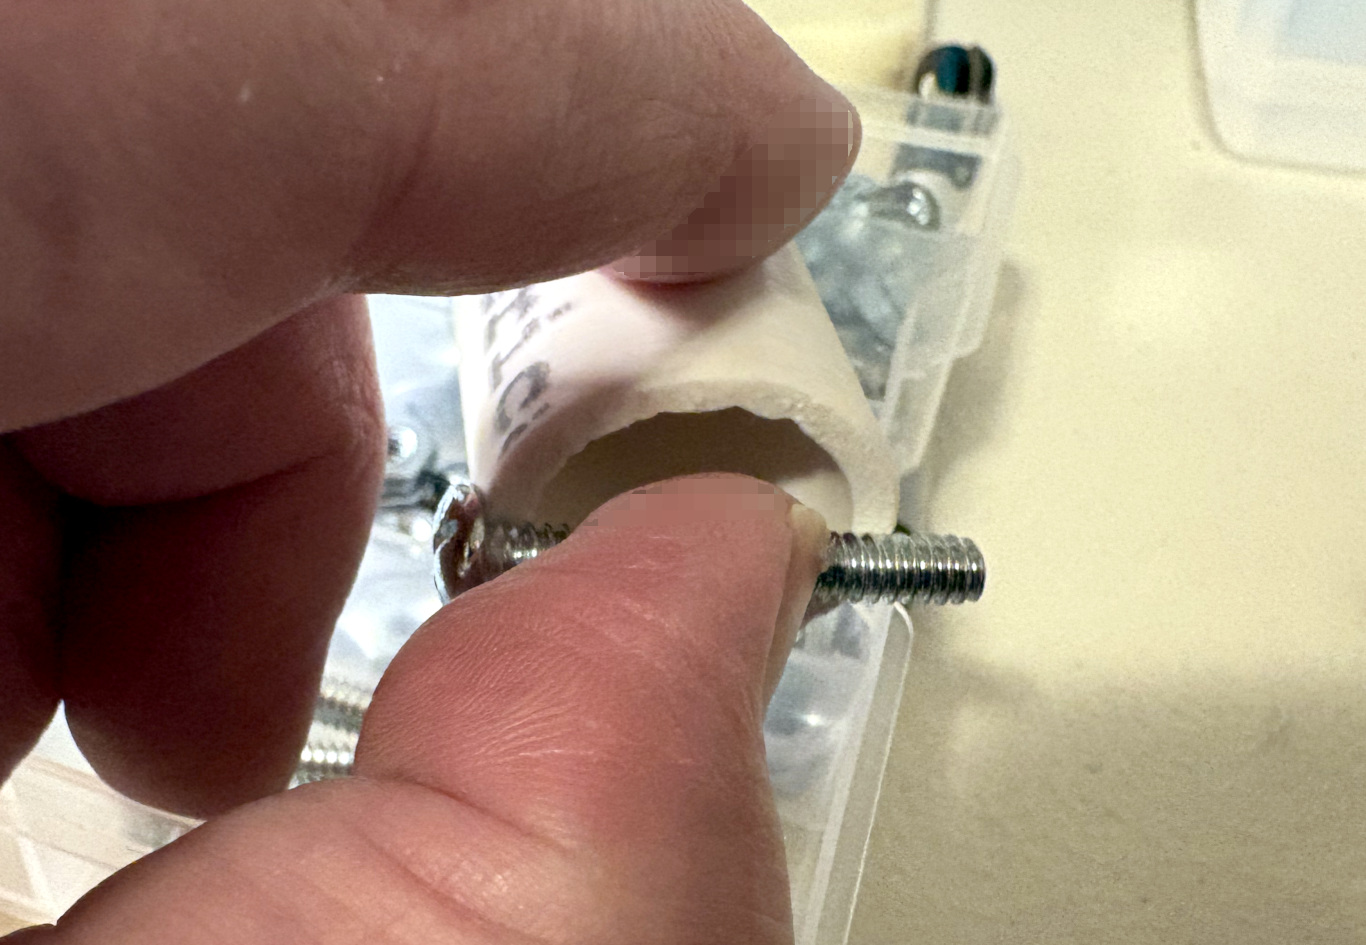
Checking to see if the screw I have will work

Preparing to drill the stopper screw hole
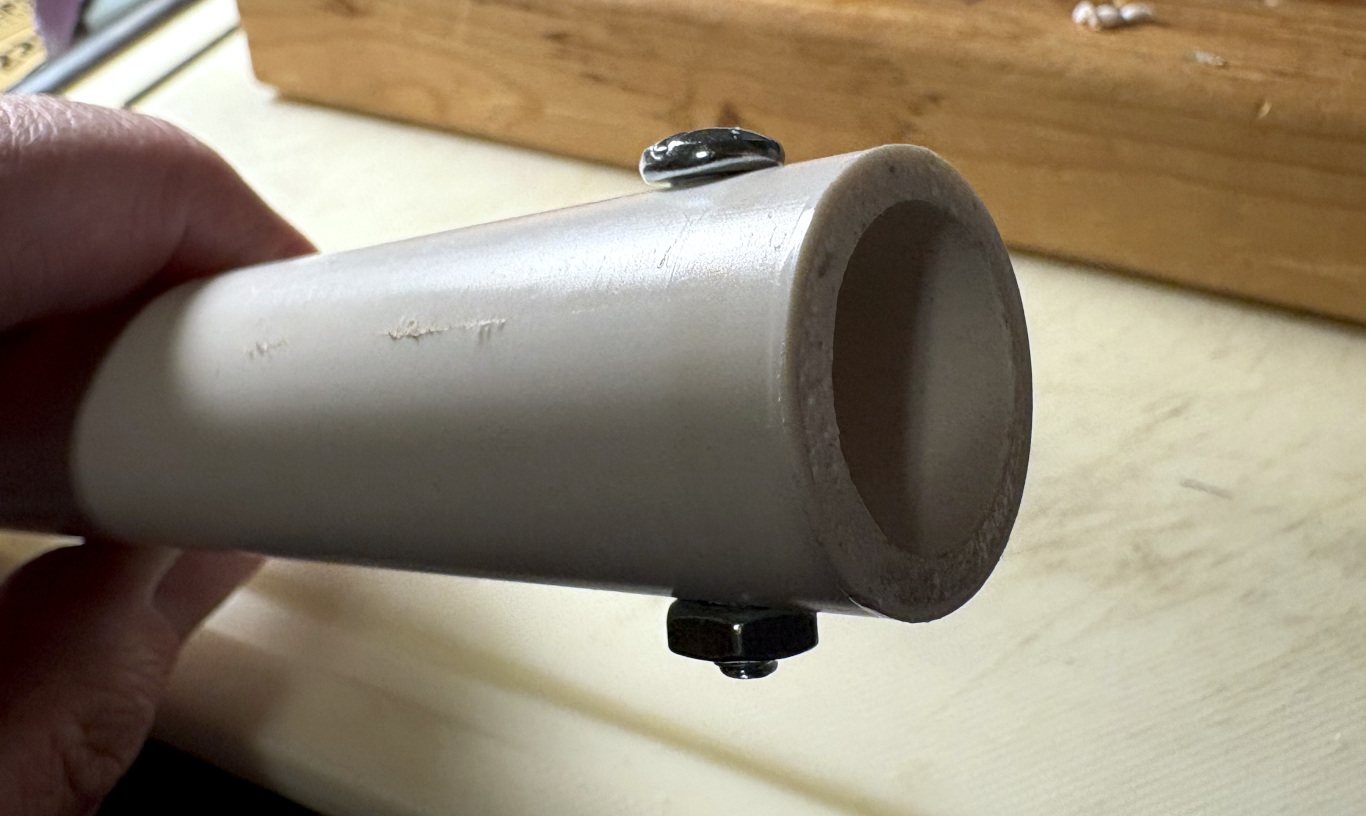
Hole drilled and stopper screw and nut installed
Whip sitting inside the PVC pipe holder
Cutting out the connection 'window'
In the original version of the paint-pole antenna, I just shoved the 43-inch telescoping whip
into a hole that also had a wire running through it. That setup used friction to press the wire
against the telescoping whip. While the wooden paint pole might be just wide enough to
accomodate this new telescoping whip, if I wanted to use the same setup, I don't have a drill press
and my ability to drill straight by hand is non-existent. I needed a different way to connect to the
antenna that was reliable and also not super-fragile.
I rolled it around my brain for a while and decided to cut a 'window' into the PVC pipe holder. My plan was to use a large alligator / battery-post clip to make the connection from the loading coil to the telescoping whip. We recently purchased a Ryobi Dremel-like tool for another house project so I figured I could use it to cut the window in the pipe without destroying it. Since I've never used a Dremel-like tool for something like this before, I wasn't sure which cutting media to use, so I drilled a bunch of holes along the outline of the window (which turned out to be completely unnecessary) and then took a small sanding disk attachment and did a rough cut through the pipe.

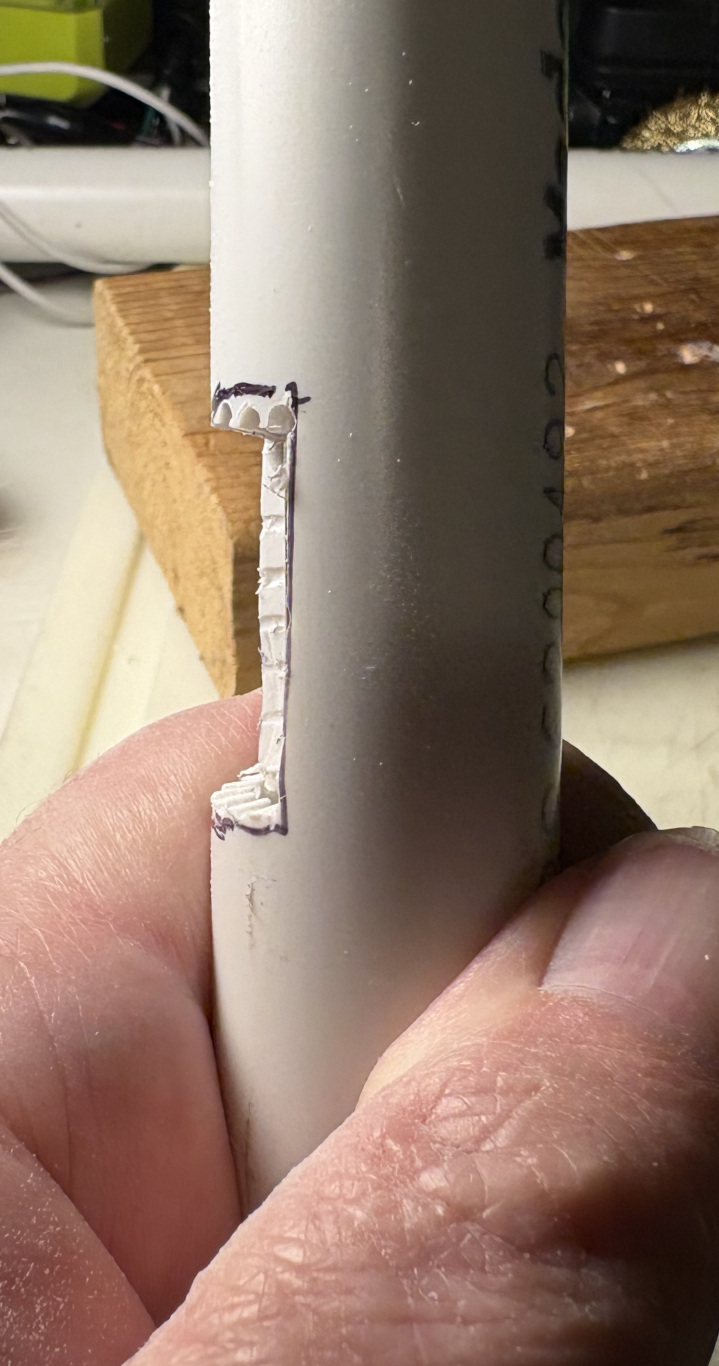
I marked out where to cut the antenna connection 'window'

I drilled (unnecessary) holes along the outline of the window
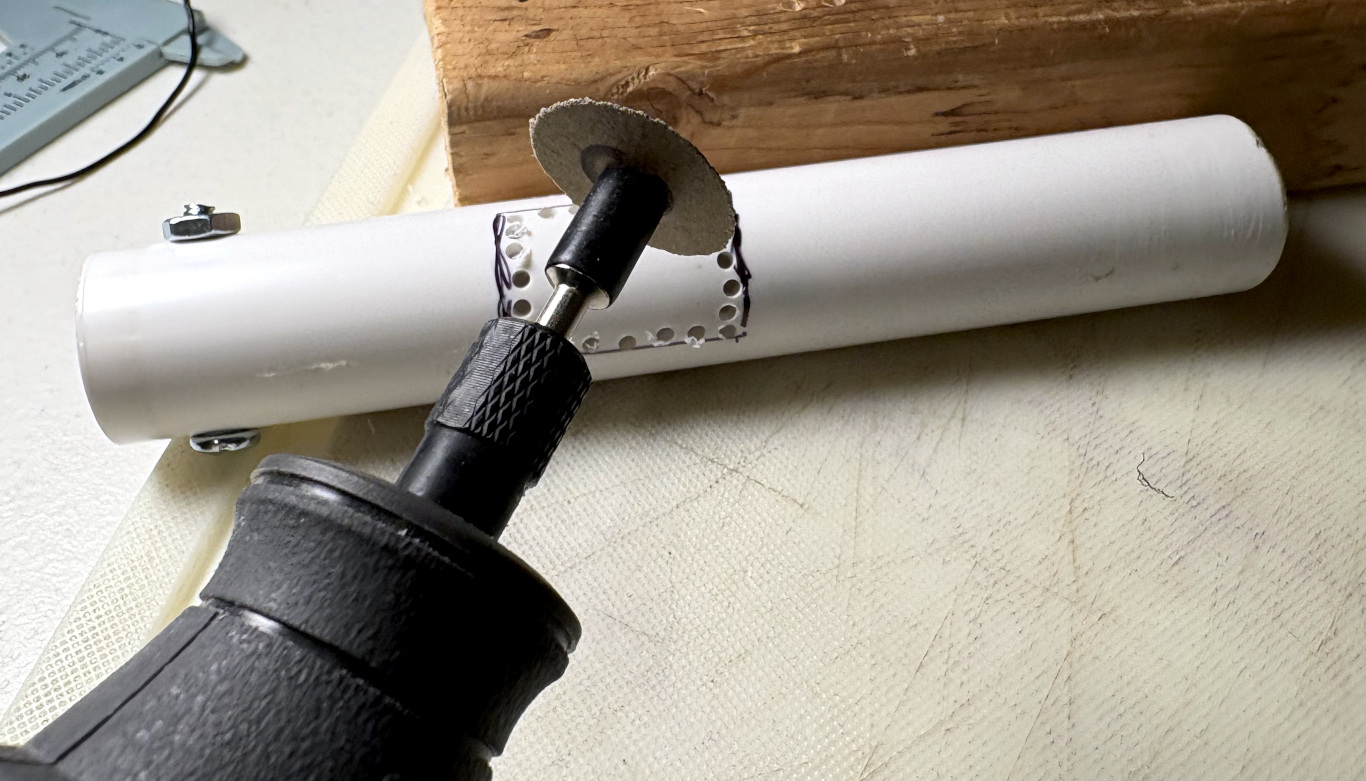
I used a sanding disk attachment to do the rough cut
Window rough cut done
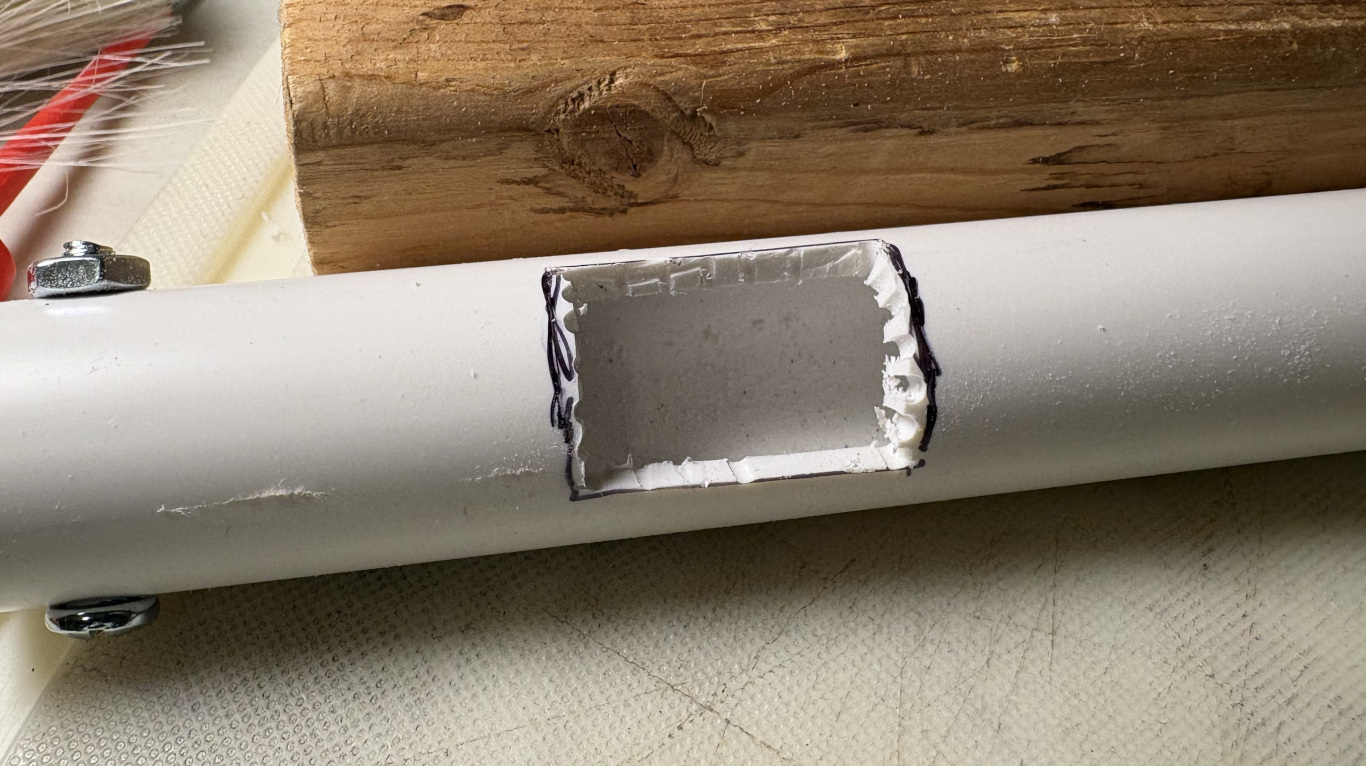
After doing the cut, I put the telescoping whip into the pipe to check how much could be clamped onto by the battery clip. Unfortunately my first try was too shallow and I had to make another, more deeper cut. After that, a good amount of the whip was available to clamp on to.
Side view of window cut-out. Too shallow
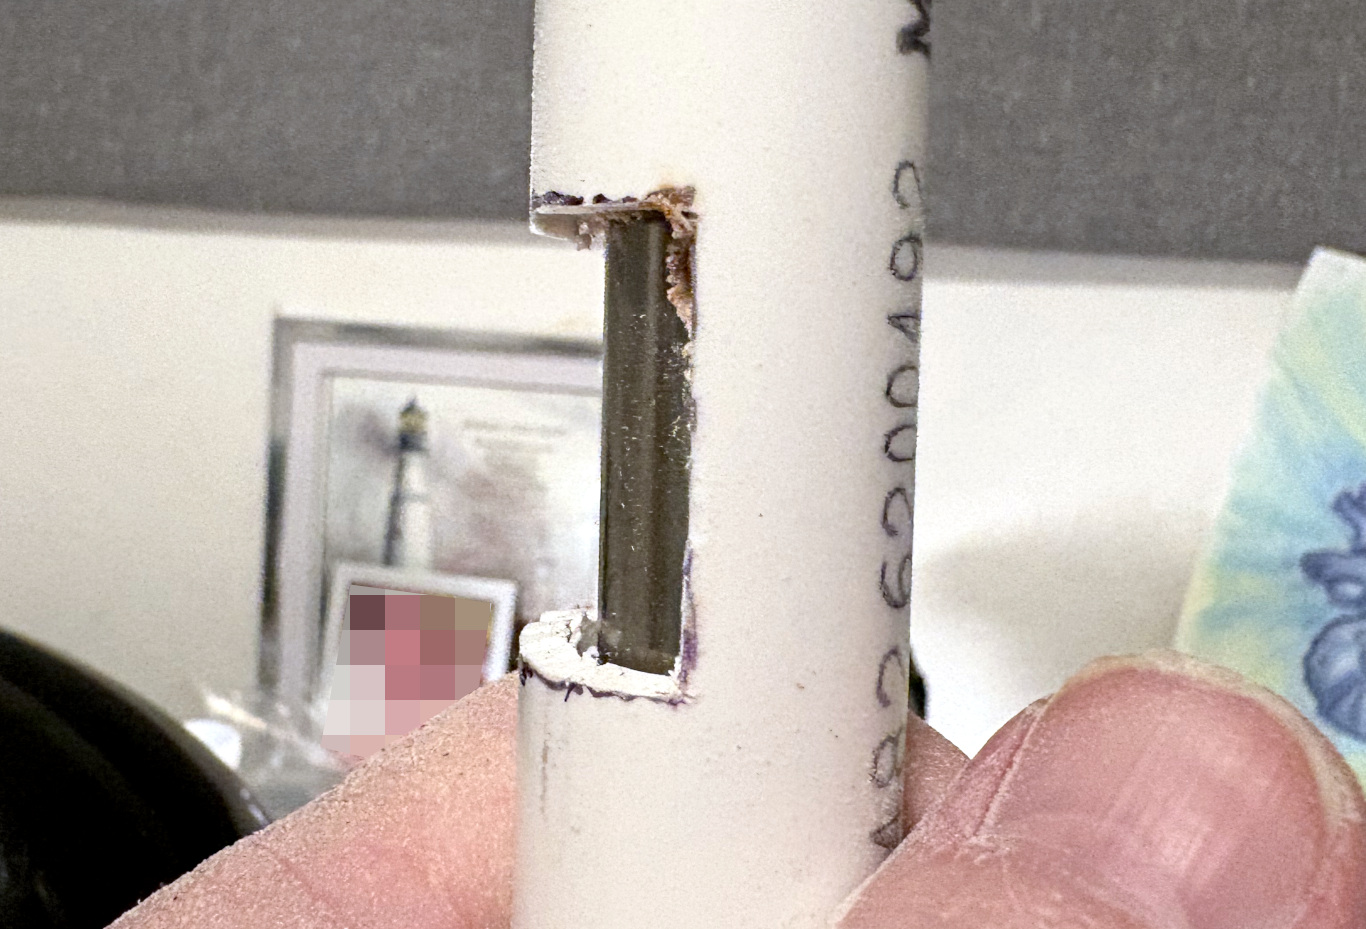
Side view of the window after the second cut. Much better

Smoothing out the cut-out's rough edges
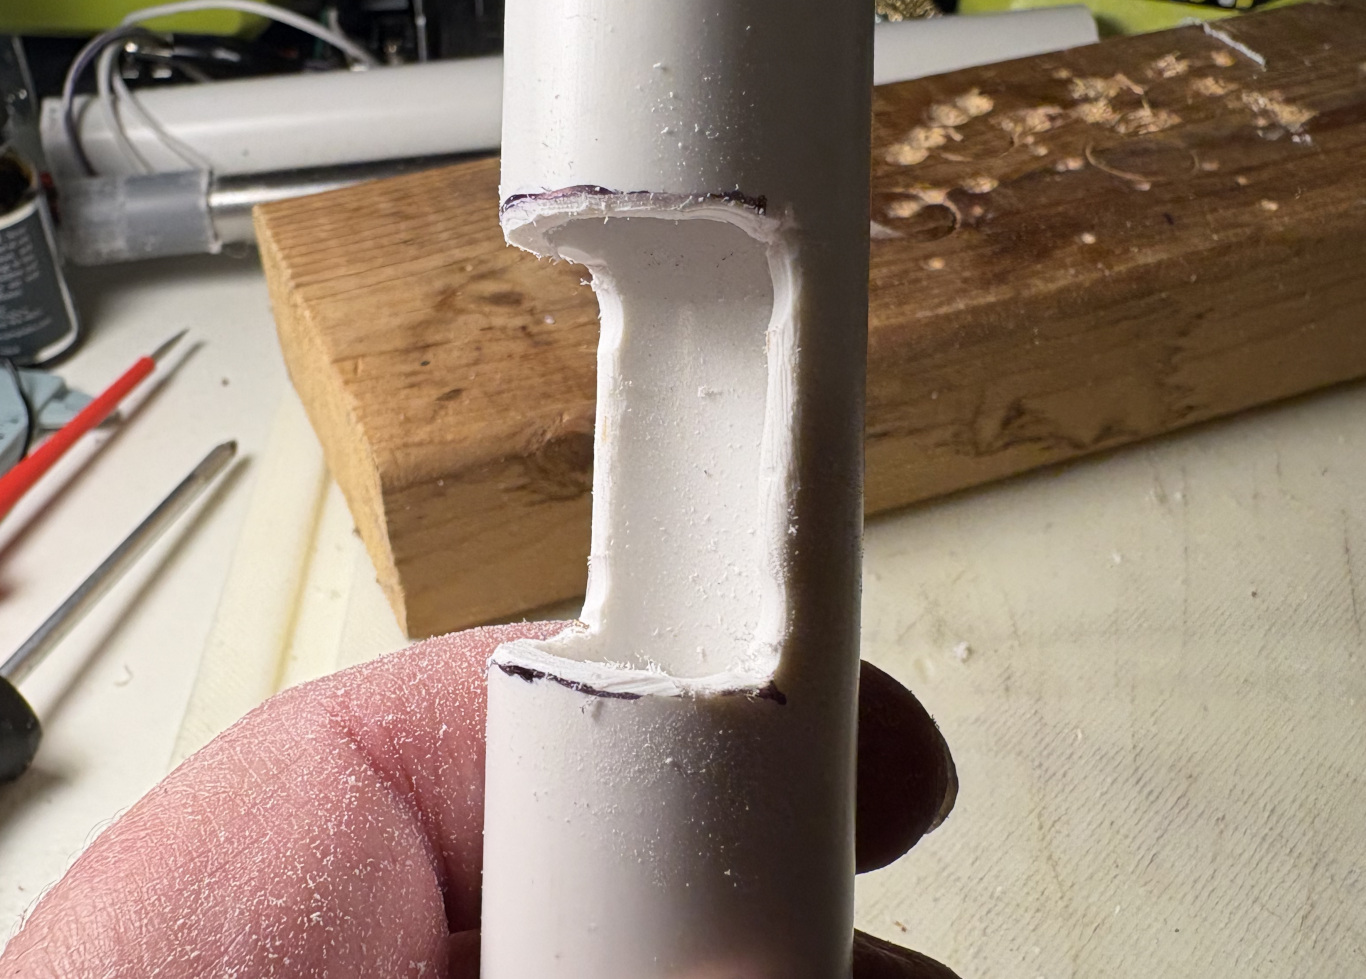
Slightly less appalling
More smoothing, this time with a tubular sandpaper attachment
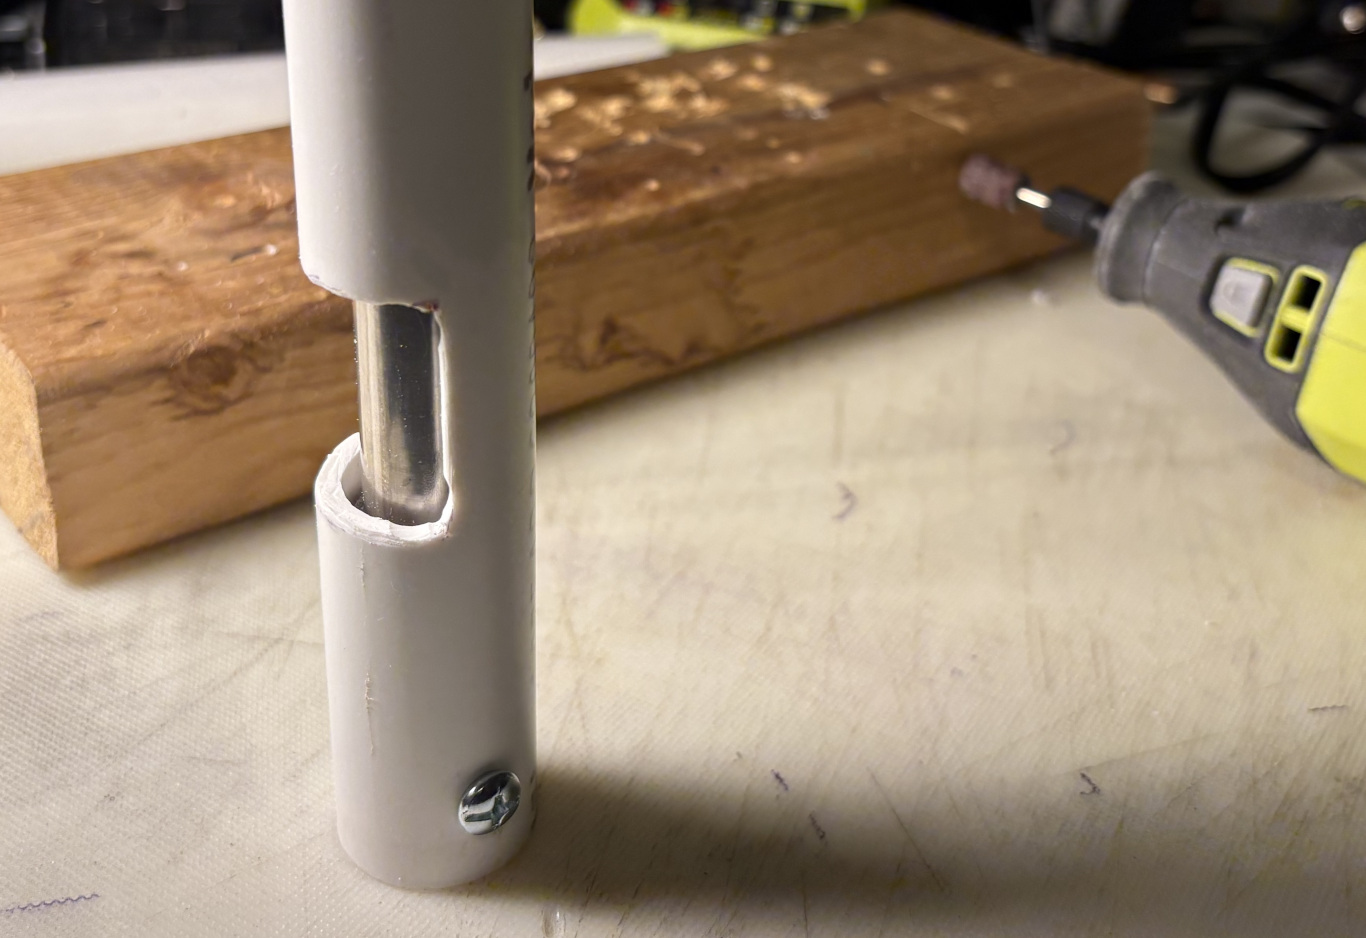
After smoothing out the roughest parts of my window cutting, I tried fitting the battery post clip to the telescoping whip through the window and it looked good. I then wire-tied the PVC pipe holder to the bottom section of my original wooden paint-pole antenna.

Testing the battery post clip antenna fitment
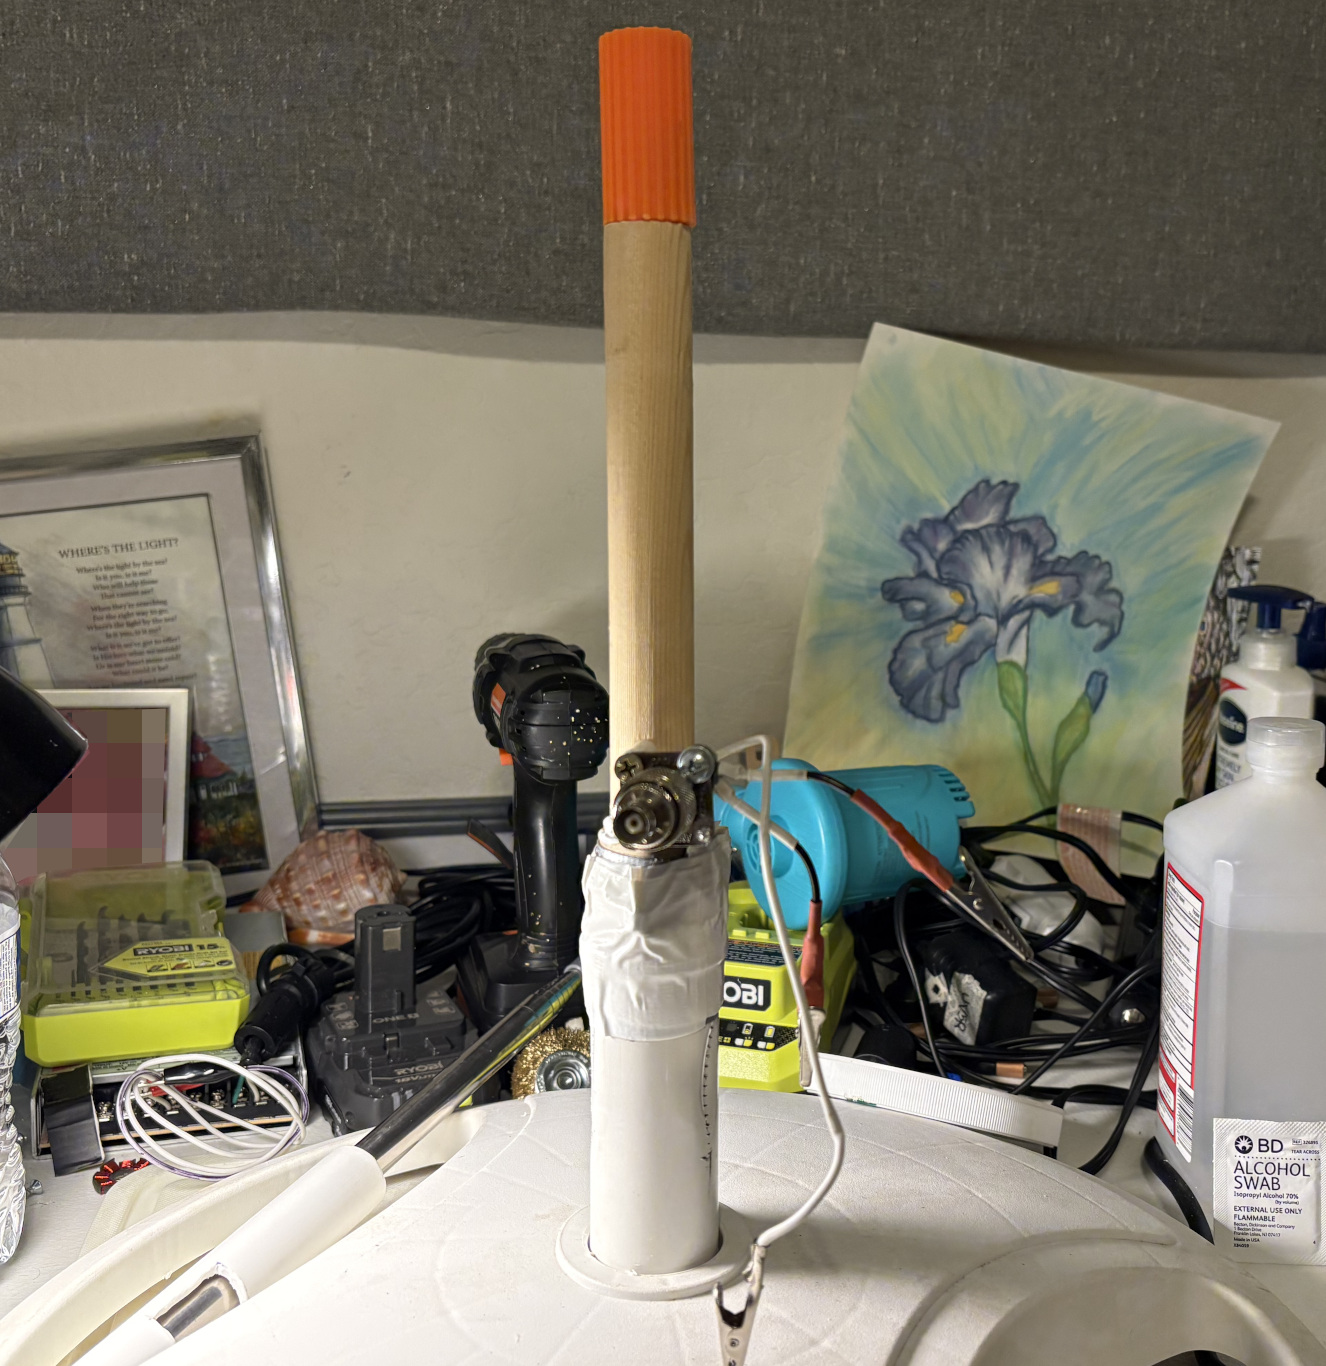
The existing bottom portion of the original paint-pole antenna
(That's my wife's art in the background 😍)

PVC pipe holder wire-tied to bottom of the original paint-pole antenna

Whip and connection added
Loading coils
Now that the radiating element was finished, it was time to wind up some loading coils for 20 and 40
meters. In the past I would have stressed a lot more with this part of the project because I had no
L/C meter to check my hand-wound coils. Back in 2021, right after I got out of the hospital for covid,
I purchased an inexpensive L/C meter. My plan was to make my own coils and wanted a way to test their
value. Unfortunately we moved not long after that, and the L/C meter was completely missing until this
year (2026)! I honestly thought it was left behind at a motel while we waited for our current house's
sale to go through. A few month ago I happened to be looking for something else and accidentally found
the L/C meter in our garage! Woo hoo!
I know there are online calculators for air-core inductors, and indeed I used K7MEM's coil calculator to get me in the ballpark. Then I tweaked windings until the L/C meter showed the proper inductance for the coil I was trying to wind. More tweaking was necessary once I tried the antenna and coils wired to my ancient antenna analyzer. Eventually I got things pretty close. Surprisingly, the 40 meter loading coil gave me way better results than I expected while the 20 meter loading coil couldn't give me anything lower than 1.6 to 1.8 SWR. I added a small piece of offset left-over paint pole that I could easily slide each coil over. It's not super snug or secure, but the coils are being supported well enough.
Loading coil specifications
Unlike my first paint-pole project, I will not publish the coil specifications here, but if you're
building something similar and would like more information, please leave a comment below and I'll be
happy to share what I know. 👍
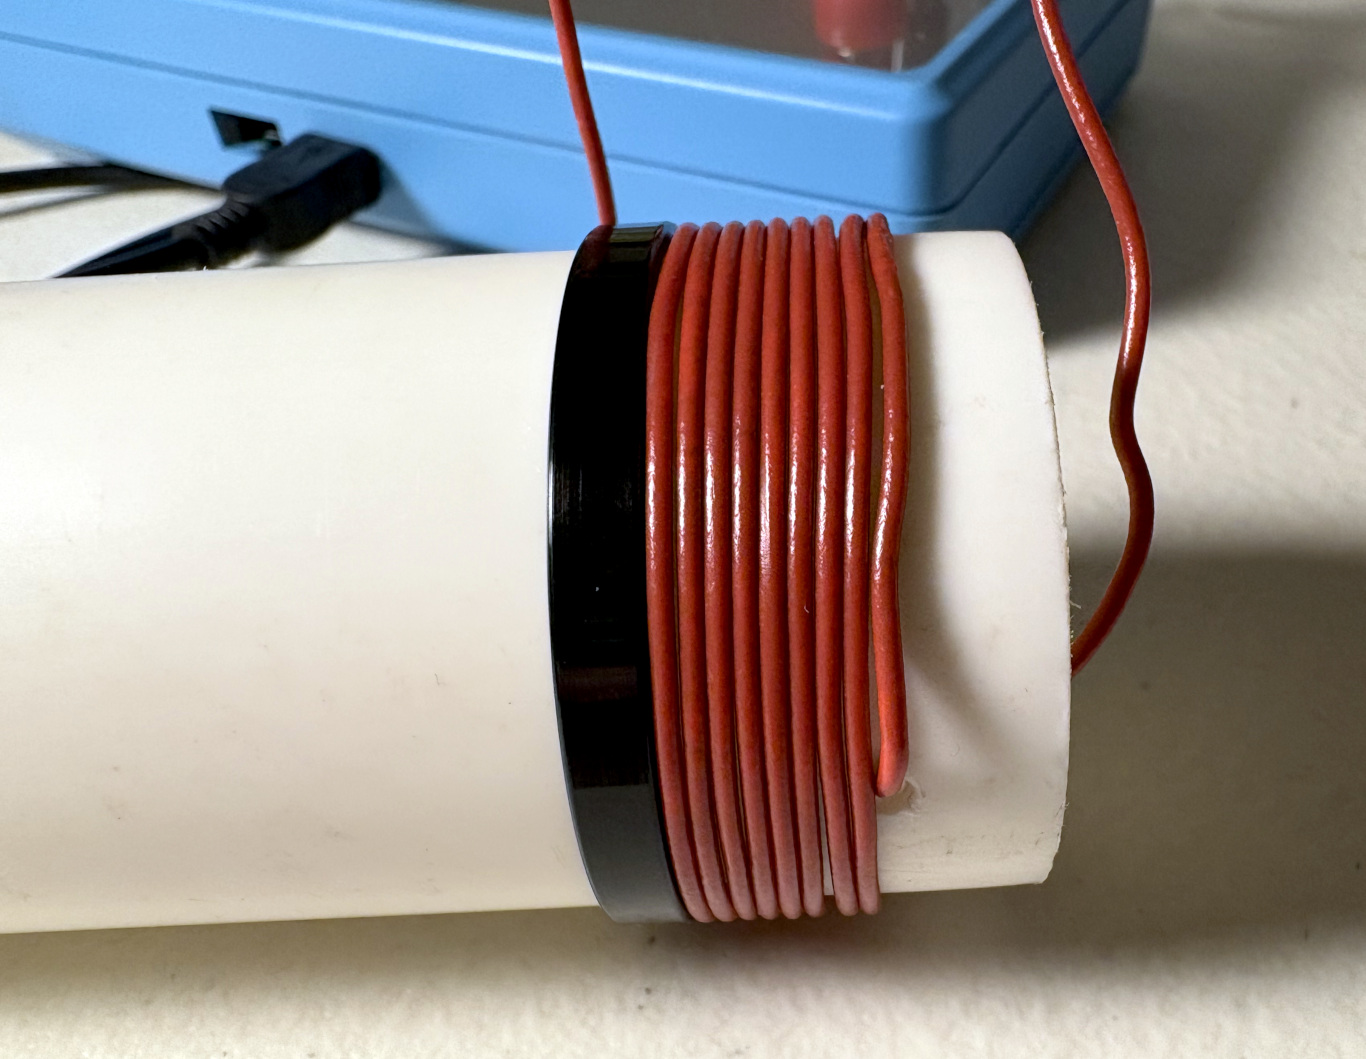
Winding a loading coil for 20 meters

Added the coil and coil peg holder to the new setup
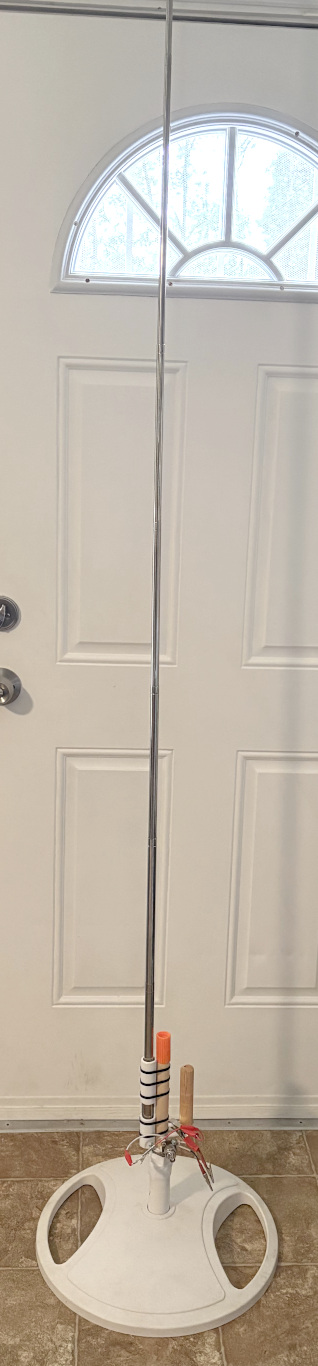
The Paint Pole 2 antenna
Performance
I have been eager to build this new version of the paint-pole antenna because the previous radiating
element had a maximum height of 43 inches / ~1.09 meters compared to this version's 7 foot / ~2.14
meters height. I figured that the extra radiator length would give me a big boost compared to the
relatively tiny previous whip. In practice, though, the boost hasn't really shown up yet, at least
not on 20 meters.
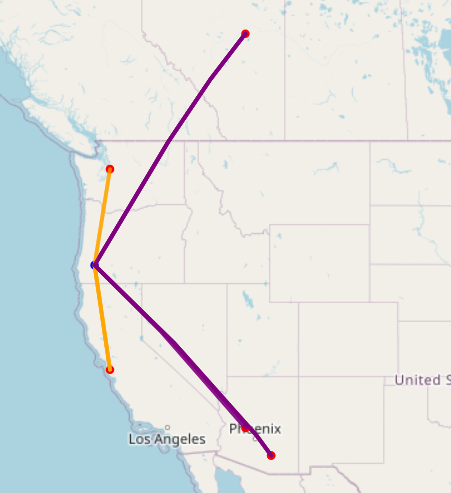
Paint Pole 2 RBN map
(Orange is 40 meters, purple is 20 meters)
As seen in the above image, I never broke the 1,000 mile / ~1,609 km barrier, although my signal on 40 meters has consistently been much stronger than when using the original paint-pole antenna design. I think if I tinker with the 20 meter loading coil a little more, it might get better. Right now, though, I've completely omitted the loading coils and I'm just using an inexpensive QRP antenna matcher until I have more time to adjust things. I know it's not great that the base of the radiating element is so close to the ground, but this is what I have to work with right now.
Another limiting factor is that I'm using this antenna inside of my house. I cannot stretch the radials out very straight and of course there are metallic things all over the place that are undoubtedly interacting. I don't have my own working car to go to a park and test, and operating outside of our house would be quite unpleasant (I will fully explain once we move someday). At least this current design isn't a 'dummy load with a personality' although it's not terribly efficient, either.
Another project completed
I'm grateful that this antenna is pretty much finished! I have been thinking about building it for a
long time, but before Jesus completely healed me of cancer, I had very little strength or stamina to
do much of anything. I'm so grateful I'm on the other side of that! If I do make any major changes or
adjustments to the design, of course I will update this post or will post something separate. 👍
God bless you, and thank you for reading!
![]()
About me
First and foremost I'm a follower of Jesus Christ. After that, I'm a blessed husband, father and
grandfather. I do remote computer work for a living although it's mostly part-time. I'm an amateur
radio operator - AF7EC. When I'm not working on the endless list of house and car projects, I like to
tinker with electronics, like to listen to shortwave radio and write software (mostly open-source) in
C, C++ and Python. I usually bounce around between macOS, Linux and Windows for support and
development work. Overall, I am a big nobody, but always willing to share about Jesus and all that
God has done for me and my family.
Comments
(No comments yet)